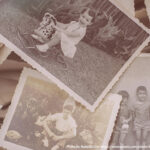
Have you ever stumbled upon a treasured old photo, only to find it faded, scratched, or torn? Over time, photographs deteriorate due to age, light exposure, and improper storage. But don’t worry—you can restore old photos at home with the right tools and techniques! In this guide, we’ll walk you through simple steps to enhance old images, and we’ll also explain when it’s best to leave the job to a professional.
Step 1: Scan Your Old Photos Properly
Before any restoration, you need a high-quality digital copy of your photo. Here’s how to do it:
Use a flatbed scanner with at least 300-600 DPI or PPI resolution for the best detail. DPI is primarily used when the information being scanned is going to be printed, PPI is often used for digital viewing. However most scanner settings will display the resolution in DPI which is absolutely fine for what we need.
If a scanner isn’t available, take a high-resolution photo using your smartphone in good lighting. Avoid harsh shadows and window reflections as this will make the restoration a bit trickier later on.
Save the file in TIFF or PNG format instead of JPEG to prevent further quality loss.
Step 2: Basic Colour and Contrast Adjustments
Once you have a digital copy, you can begin enhancing it using basic editing software like Adobe Photoshop, Lightroom, or even free tools like GIMP or Snapseed.
Adjust Brightness & Contrast: Increase contrast to make details pop.
Color Correction: Use auto-correction tools or manually tweak levels to remove discoloration.
Reduce Fading: Add warmth and saturation to bring the image back to life
Would you find a video tutorial helpful for these features? Let me know in the comments which software you’d like to see covered, and I’ll do my best to create one!
Step 3: Removing Scratches and Stains
If your photo has minor damage, you can clean it up using cloning and healing tools:
Spot Healing Brush (Photoshop): Click over small scratches or dust marks to blend them away.
Clone Stamp Tool: Copy a clean part of the image and paste it over damaged areas.
Gaussian Blur (For Minor Noise Reduction): Helps smooth out grainy textures.
Would you find a video tutorial helpful for these features? Let me know in the comments which software you’d like to see covered, and I’ll do my best to create one!
Step 4: Fixing Major Damage
For missing parts, tears, or large stains, try these techniques:
Use Content-Aware Fill (Photoshop) to automatically reconstruct missing sections. This doesn’t always get it right but it’s always worth a try.
Manually recreate details by carefully cloning textures from other parts of the image.
For photos with extreme damage, professional retouching is the best solution.
Would you find a video tutorial helpful for these features? Let me know in the comments which software you’d like to see covered, and I’ll do my best to create one!
When to Call a Professional 💪
While home editing can fix minor issues, some photos require expert restoration. Consider hiring a professional if:
✅ Your photo has severe tears or missing pieces
✅ It’s an important family heirloom and you want high-quality results
✅ You lack the time or experience to restore intricate details
✅ You need an artistic restoration with enhanced details
A professional restorer can use advanced techniques like AI-enhanced sharpening, detailed hand-painting, and texture rebuilding to bring your image back to life.
Restoring old photos is a wonderful way to preserve memories, whether you do it yourself or seek professional help. If you have a special photo that needs expert restoration, I’d love to help!
📩 Contact me today for a free consultation and let’s bring your cherished memories back to life. 💖✨
Find my contact details here or use the form at the bottom of this page 👇
#PhotoRestoration #MemoryPreserved #OldPhotos #BeforeAndAfter


